The land of nativity figures
Visit a nativity figure maker’s workshop
Nativity figures, or “santouns”, which is a Provençal word meaning “little saints”, hold a special place in the heart of the people of Provence and, when that time of the year comes around, can be found on sideboards in people’s homes, where the nativity scene is recreated each year.
We were keen to get the inside story on this decorative piece, and discover how these Provençal nativity figures, which are an integral part of the Provençal Christmas tradition, are made.
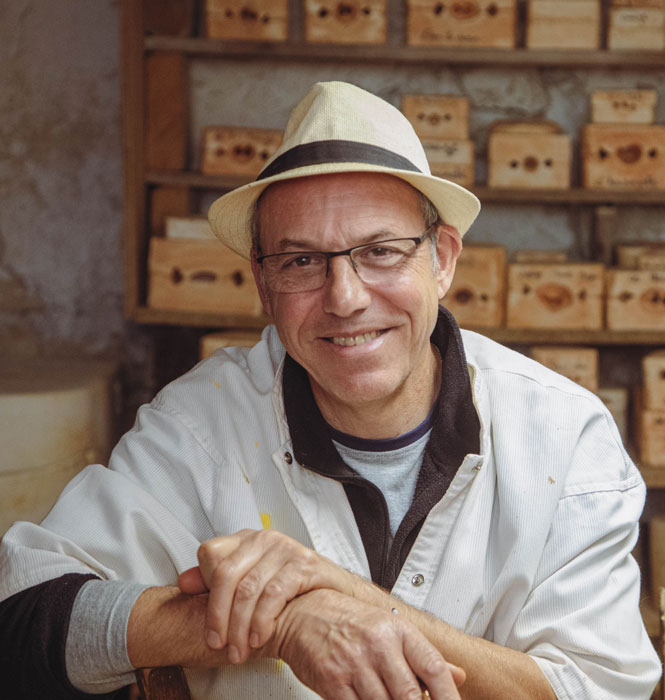
We stopped in to see Denis Vœux in Séguret and delve into the world of his personal passion, a world full of poetry and the magic of Christmas.
With a place comes a story where it all began
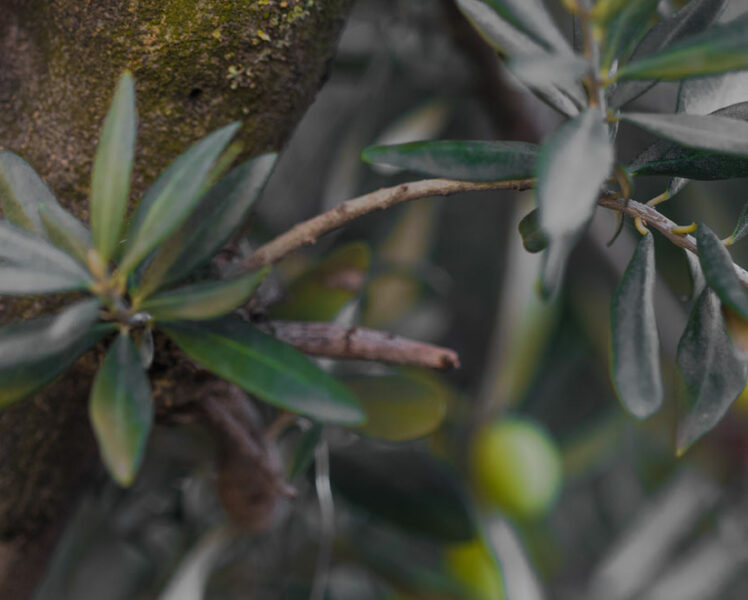
His workshop and adjoining boutique are part of his home (he lives in another part of the building), which is a pretty 18th century farm surrounded by vineyards and olive groves, on the Vaison-la-Romaine road, with a breathtaking view over Séguret on one side, with Rasteau in the distance, beyond the olive groves.
Denis, who gives us a warm welcome, tells us that this farm is where his grandparents lived and that he found a record of this pretty stone building in the local archives, attesting to the presence of a farm here dating back to 1710. It was here, in this charming home full of history, that he set up his workshop in the former stables, some 30 years ago.
Born in Vaison-la-Romaine, Denis was the son of farmers and worked in the wine industry at the time. Nothing in his history pre-destined Denis to become a nativity figure maker (or “santonnier”).

Did you know?
Denis has always been surrounded by the tradition of the nativity. Not only was it a family tradition; he also participated in the nativity play in Séguret from a very young age, which takes place on Christmas Eve every year in the village church (if you are going this year, look out for Denis, who will be playing the shepherd).
A revelation born of a nativity figure
For the birth of his first child, his parents gave him the gift of a nativity scene with Mary, Joseph, baby Jesus, the ox and the donkey
Opening the tissue paper that these nativity figures were wrapped in and touching the modelled, painted clay, Denis tells how he had a vision, an epiphany you could say, that he would become a nativity figure maker. And, as though someone had heard his wish, a few days later, he came across an article on Robert Canut, the renowned nativity figure maker from Tulette, who was describing his craft.
Next thing you know, he had picked up the phone, called him and told him that he wanted to learn the craft, follow in his footsteps and make a living from this personal passion. Robert willingly agreed to meet him, inviting him to simply: “Come and take a look”. This “look” would guide Denis in his apprenticeship and still drives him today because, above all, the nativity figure maker is a people watcher who also observes nature and villages… so that he can bring them to life.
Over the years, he learned the art of nativity figure making from his master, who has after 31 years become his friend as well as his mentor, and who at 86 this year, continues to create nativity figures from his workshop in Drôme Provençale.
At the beginning, Denis was working on the sidelines of nativity figure making, until one day, following a redundancy, he decided to strike out on his own and become a full-time nativity figure maker. At last, his dream would become a reality!

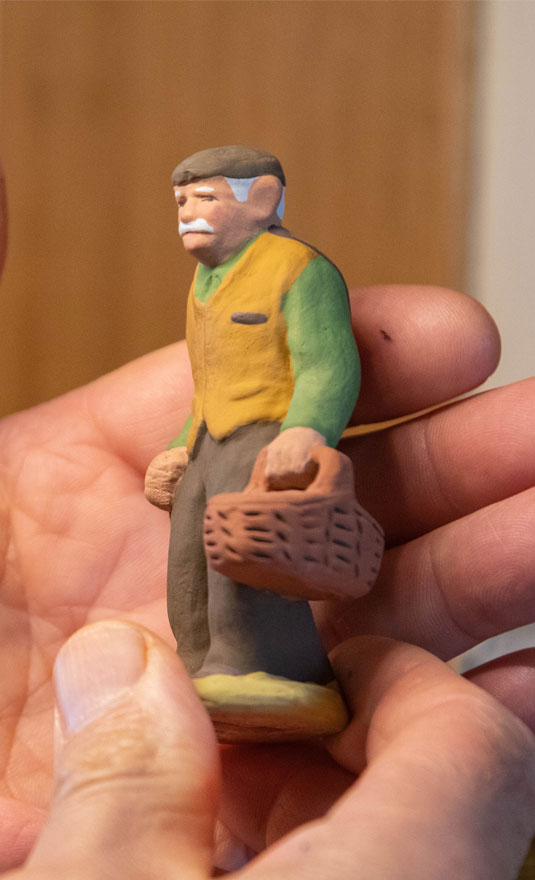
His first nativity figure
Grandpa Lèbre, in homage to his maternal grandfather
Denis sculpted his very first nativity figure many years ago, inspired by Adrien Lèbre, his maternal grandfather. He became a little emotional as he retold this story, because once this nativity figure was sculpted and its mould was created (for all eternity ), his grandfather was the one to place the first handful of clay into the mould of his likeness. Ever since, “Grandpa Lèbre” has been one of the best-sellers from Denis’s collection!
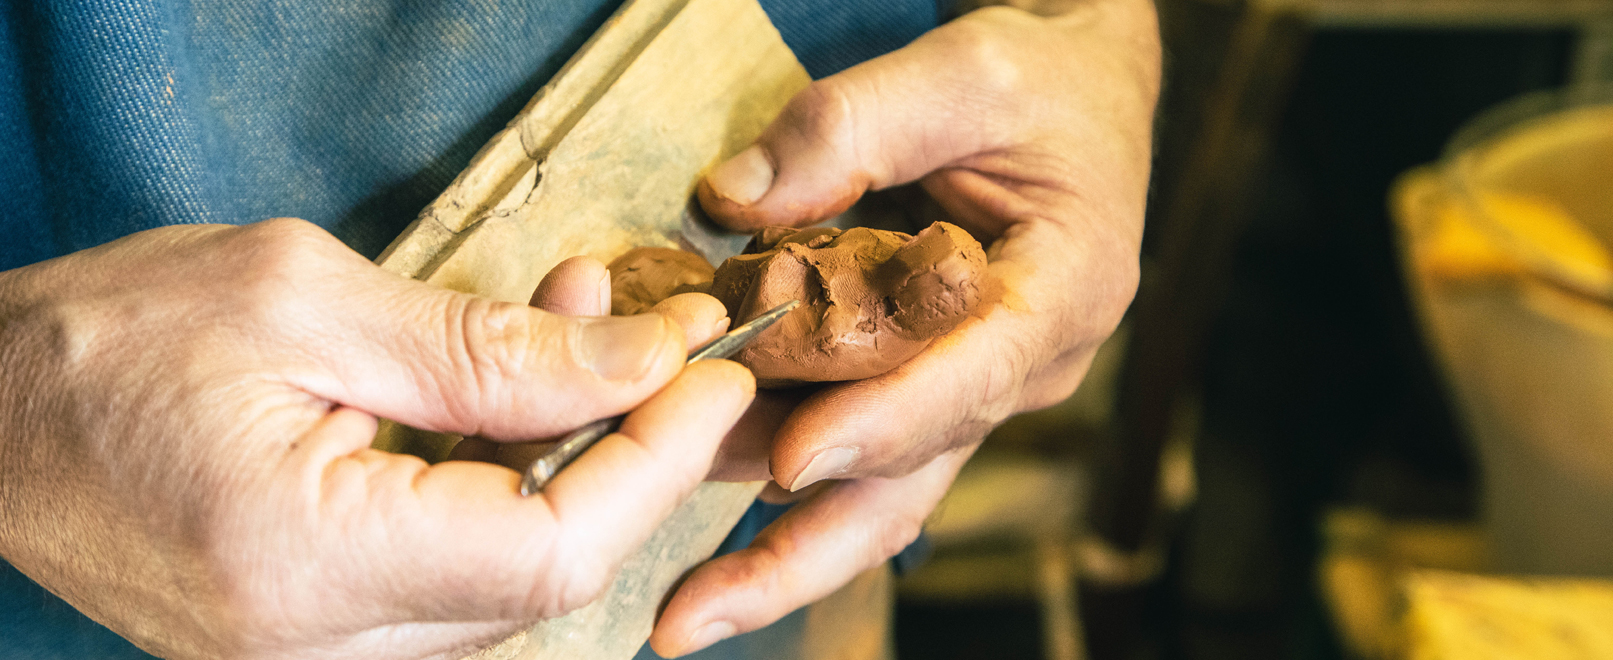
There’s a lot that goes into making a nativity figure!
When you see a painted nativity figure (in a nativity figure maker’s display or in a nativity scene), you do not necessarily realise the time, creativity, meticulous attention to detail and patience (!) that has gone into bringing the shepherd to life, or the woman carrying her bundle of sticks, or the delighted onlooker… Now it’s time to take a look at the steps involved in creating our “little Saint”… Here we go!
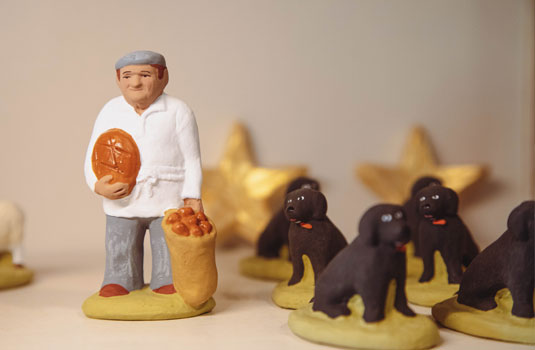
Step 1: The idea / Creating the nativity figure model – Denis’s characters are mini alter-egos of real people and animals. The baker in Séguret, for example, the president of the Vaison-la-Romaine Provençale Association, the sheepdog cross, the dogs, the sheep that you come across when you turn a corner, the olive grove next to the house, the neighbour’s vineyard, a mill, a rustic stone hut… Anything can serve as inspiration for a nativity figure or decoration!
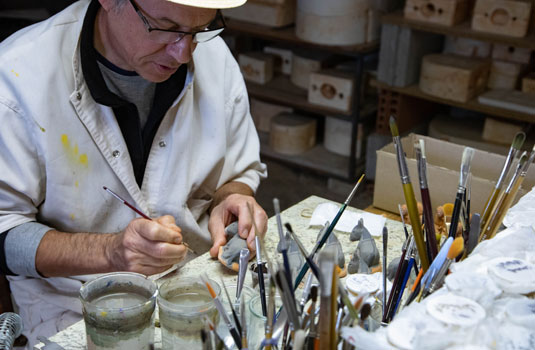
Denis sculpts his nativity figure by hand from a lump of clay, right down to the finest details. The facial features will be created at the painting stage (more about that later).
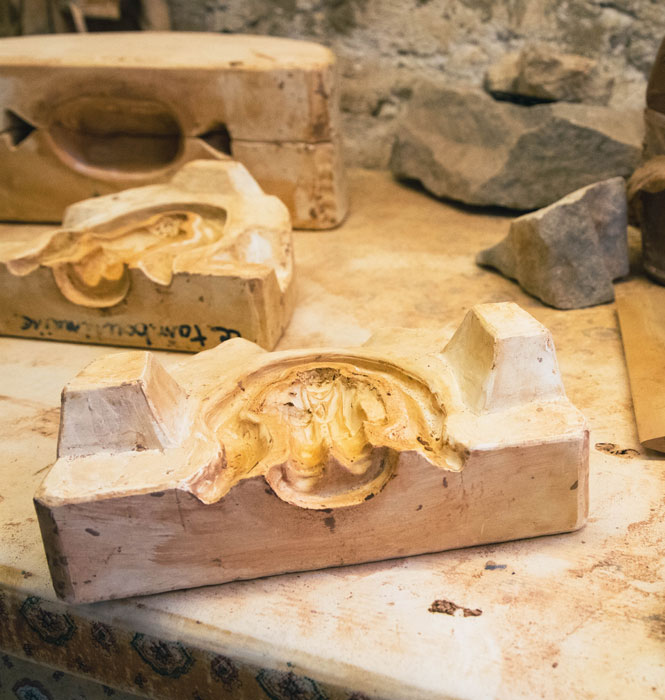
Step 2: Creating the mould using plaster, with this nativity figure model as the starting point. Denis creates moulds known as “Marseillais”, which have rounded shapes and edges. He prefers them for long-term use, as those with sharp edges can cause injury or at least be awkward to use (but as he says, each nativity figure maker has his own preferred moulds, practices and techniques). The models always have a kind of furrow all around the character, to collect any surplus clay.

Did you know?
Some of Denis’s characters and decorations are in fact the result of several moulds being skilfully joined together, such as his tambourine man or his olive tree, which were created in clay, using 4 moulds.
Moulding and Trimming
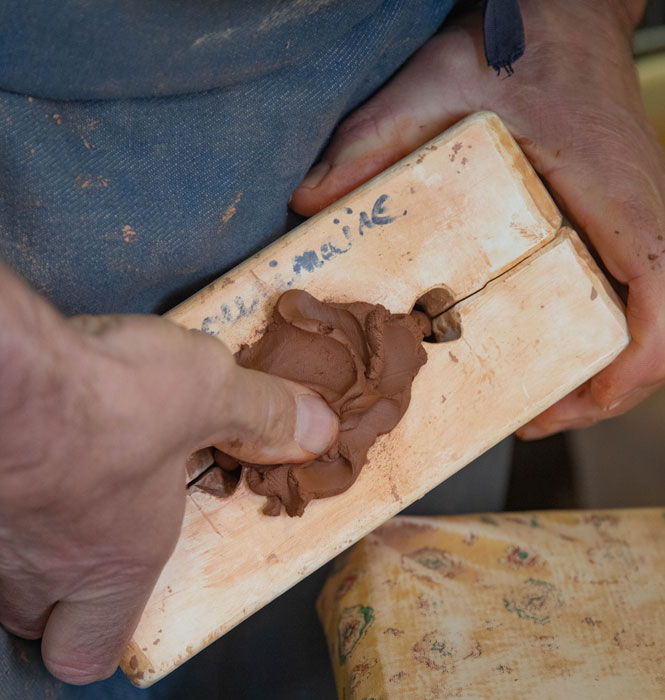
Step 3: Moulding – You put a little piece of clay in the mould, making a pointed tip that is applied firstly to the face (“you don’t want him to end up without the tip of his nose! ”, as Denis says), then you squeeze the two edges together tightly so that the clay spreads to fill all the corners of the mould. The surplus will come out through the bottom of the mould (this part will serve as the base). You wait a few minutes, then you open the mould on one side. You wait another few minutes, then you drive a rod into the base to turn out the second part. Your new basic nativity figure is born! Denis applies his stamp underneath the base because, yes, a nativity figure is also part of a brand .
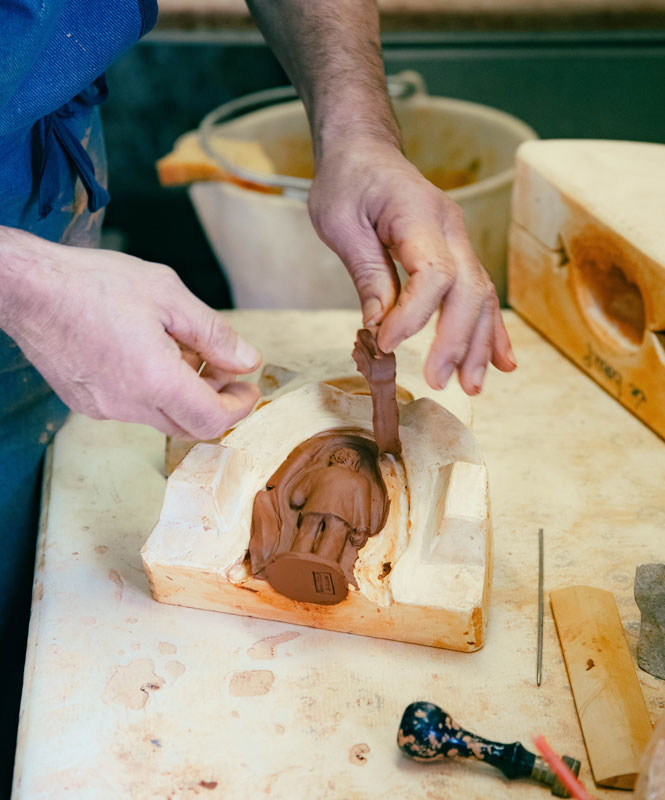
Step 4: Trimming – The newly created nativity figure still has little pieces of clay stuck to it, which are carefully cut off using a thin blade, after having waited for the clay to dry a little, so as not to damage the nativity figure or cause it to become misshapen. This is the point where you would make the hole on the shoulder of the woman carrying her bundle of sticks, for example, or on the fisherman’s hands. You dust it off with a brush, and put the finishing touches to the features and folds in the fabric… as needed. And there you have it, our freshly moulded nativity figure is ready to get cooking… Finally, it’s time to put it in the kiln
Important!
Surplus clay from the mould is never thrown away. Either it is used to make a slip casting (a sort of adhesive with a clay and water base that is used to glue on attachments or accessories), or it is returned to the main block of clay. As for the little left-over ends, Denis makes them into dice, which are given pride of place on his work bench and which he often gives to children who visit his workshop.
Firing and Decorating
The final steps in making a nativity figure
Step 5: Firing – As you would bake a nice loaf of bread, a nativity figure has to be well cooked, at 980°C for at least 8 hours, in Denis’s workshop. Once it has been fired, he turns off the kiln so that it can gradually cool. All in all, it takes around 24 hours after putting the figure in the kiln for it to cool down completely. The “well-cooked” nativity figure then goes to join his friends on the shelves, to await the final step: decorating.
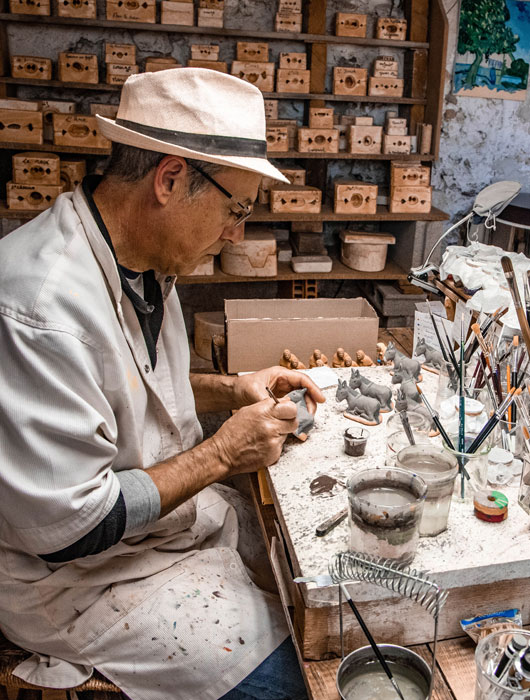
Step 6: Painting & Decorating – Denis explains that it takes him around 45 minutes to paint and decorate a nativity figure. It is painstaking work, in which his characters are brought to life, with their expressions and the movements that are bestowed by the creativity, skill and inventiveness of the figure maker. Top tip from the figure maker: always end with the base. Our nativity figure is finally ready to take its place in the shop, before finding its place in your nativity scene .
There you have it! Now you know all there is to know about how Denis’s nativity figures are created. You can visit Denis in his workshop and boutique from Tuesday to Saturday, all year round.
Contacts
Denis Vœux – Les 3 Souquets – 1471 route de Vaison-la-Romaine
84110 Séguret – +33(0) 6 18 56 57 02
denis.voeux@wanadoo.fr / http://www.les3souquets.fr/
GPS coordinates
5.006401130685694
44.21751555909059